In my previous two post, i mainly focused on simple policy editor. Today i am going to show, how we can create a policy using basic policy editor.
Some of the important facts with basic policy editor….
Fact 1. You need to have small knowledge about XACML policy language. Such as What is Target in XACML Policy? What is a Rule? What is Rule combining Algorithm and Knowledge on those algorithms?
Fact 2. This editor is based on four categories which we are mostly talking in access control rules. i.e Subject, Resource, Action and Environment.
Fact 3. You can define a target and multiple rules in policy. Rules can be ordered.
Fact 4. You can plug any attribute value sources and select those attribute values when creating the policy; rather than filling text boxes by your own. By default, WSO2 registry resources, Roles of the under line user store and some pre-defined actions are the attribute value sources for resource, subject and action attributes respectively. There are an extension points that you can use to extend and bring more attribute values on to the policy editor UI.
Fact 5. You can configure policy editor view. Such as data types, attribute id and so on. I will discuss them later.
Lets go through step by step and create authorization policy based on following requirement.
1. This access control policy is written for the patient records of medi.com hospital. Patient records are stored in a location under “/patient/” directory. Therefore we are defining access control rules for “/patient/” directory.
2. Users can only access patient records from 09.00pm to 04.00pm.
3. Patient records can be created, deleted by users in MedAdminstrator role.
4. Patient records can be updated and read by users in MediStaff role.
5. All other access request to patient records must be denied.
Step 1 . Lets define name for the policy.
Step 2. Under “Policy is going evaluate…. “, you can define; for what attribute values, this policy is going to be applied (or picked) . This is similar as defining the policy target element. lets configure it such as “policy is applied for resource attribute value /patient//* with reg-ex match”.
Step 3. Define the 1st rule. Rule is “Users can only access patient records from 09.00pm to 04.00pm” . It means that if user tries to access records any other time, user must be denied. Therefore, we are writing a deny rule for users who are not accessing patient records from 09.00pm to 04.00pm . Therefore first, let define a rule name and also define the rule effect as “Deny”. Then Select “Time” from environment. Select functions as “is not” and “greater than and less than”. Write the time with GMT offset value. After defining you can add this rule in to the policy.
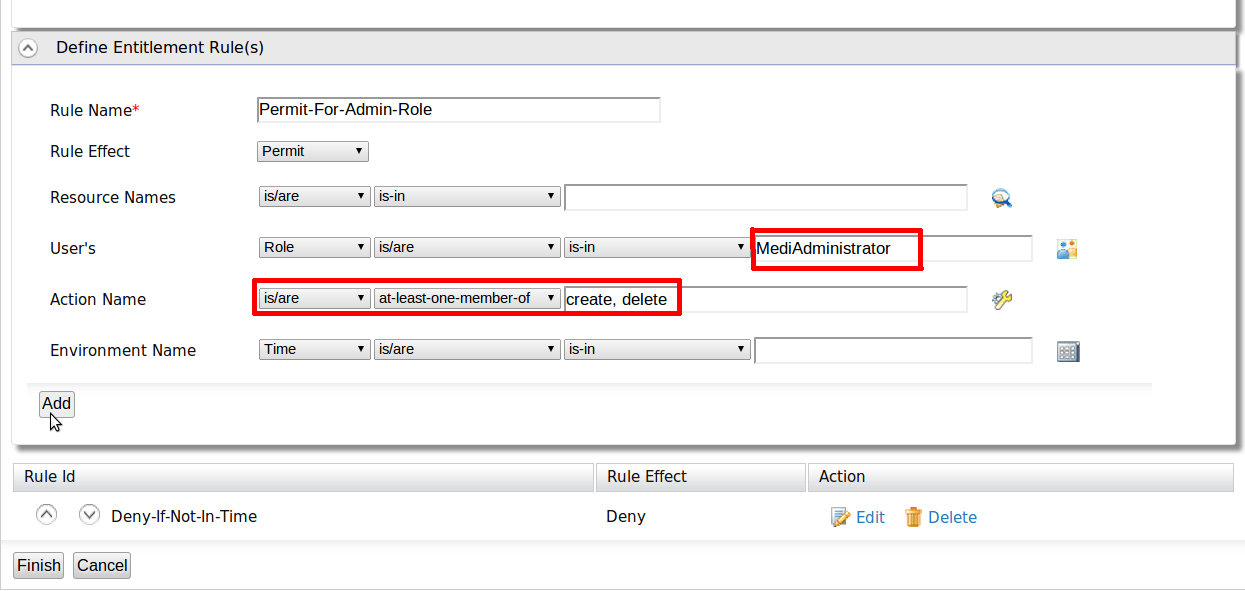
Step 4. Lets define 2nd rule. Rule name must be given. Then select “Role” as user’s attribute. You can select your “MedAdminstrator” role name from user attribute source. So just click on icon.
Step 5. You can do search for attributes values.
Step 6. You can select only the “MediAdminstrator” role from the attribute source.
Step 7. You can see, text box has been filled with the selected “MediAdminstrator” role name. Now let define actions. Here lets make the function name as “at-least-one” . Then this rule would be satisfied even when at least one action is going to perform . Finally lets add this rule in to the policy
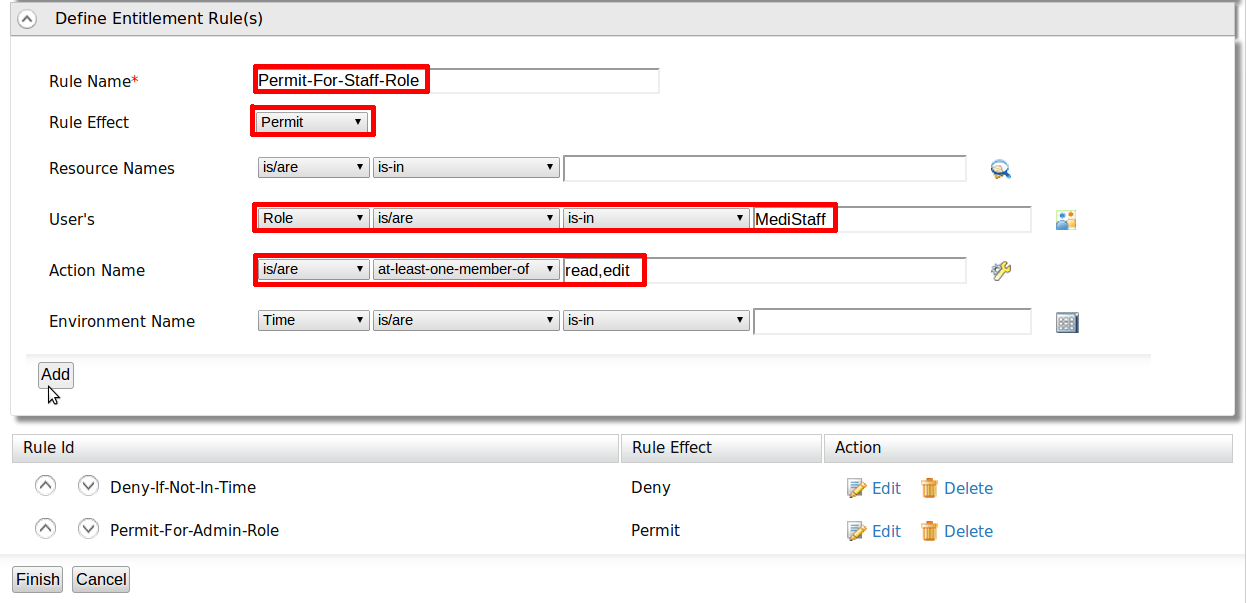
Step 8. Lets define the 3rd rule. Which allows “MediStaff” roles to access resource with action read and edit. You can follow same steps 4, 5, 6, 7. Then finally, add this rule in to the policy.
Step 9. Let define the final rule to deny all other access, as following

Step 10. We have defined the target and four rules. Now it is time to define the rule combining algorithm. Let select is as “first applicable” Then rule effect of the 1st rule that is evaluated properly, would be the final result of the policy. You can click on “finish” and finish policy creation.
You can view the XML view of the XACML policy that has been created, by using XML policy editor. You can also do modification using it or just using the basic editor. Here is the policy that is created. Hope XACML editor makes really easy for you to create simple XACML policies…. Any feedbacks are really appreciated. Also this editor is going to be improved in next Identity Server release